Today we'll see how to add a store locator to your Shopify website in less than 5 minutes with the help of a store locator software called StoreRocket.
What is it? It's a hosted store locator service that lets you add a powerful store locator to your website with no coding needed.
Just copy-paste a tiny code snippet in your website page of choice and you can manage your locations through StoreRocket dashboard. All changes will be reflected in real time to your shiny new store locator, without ever touching the code again.
StoreRocket currently offers a 1-month free trial, so you can try out the high-end StoreRocket Business package, full of premium features like Google Sheets Sync, Analytics Suite, unlimited locations and much. No credit card is required on signup. 🎉
Let's start! 🏁
1. Create an account
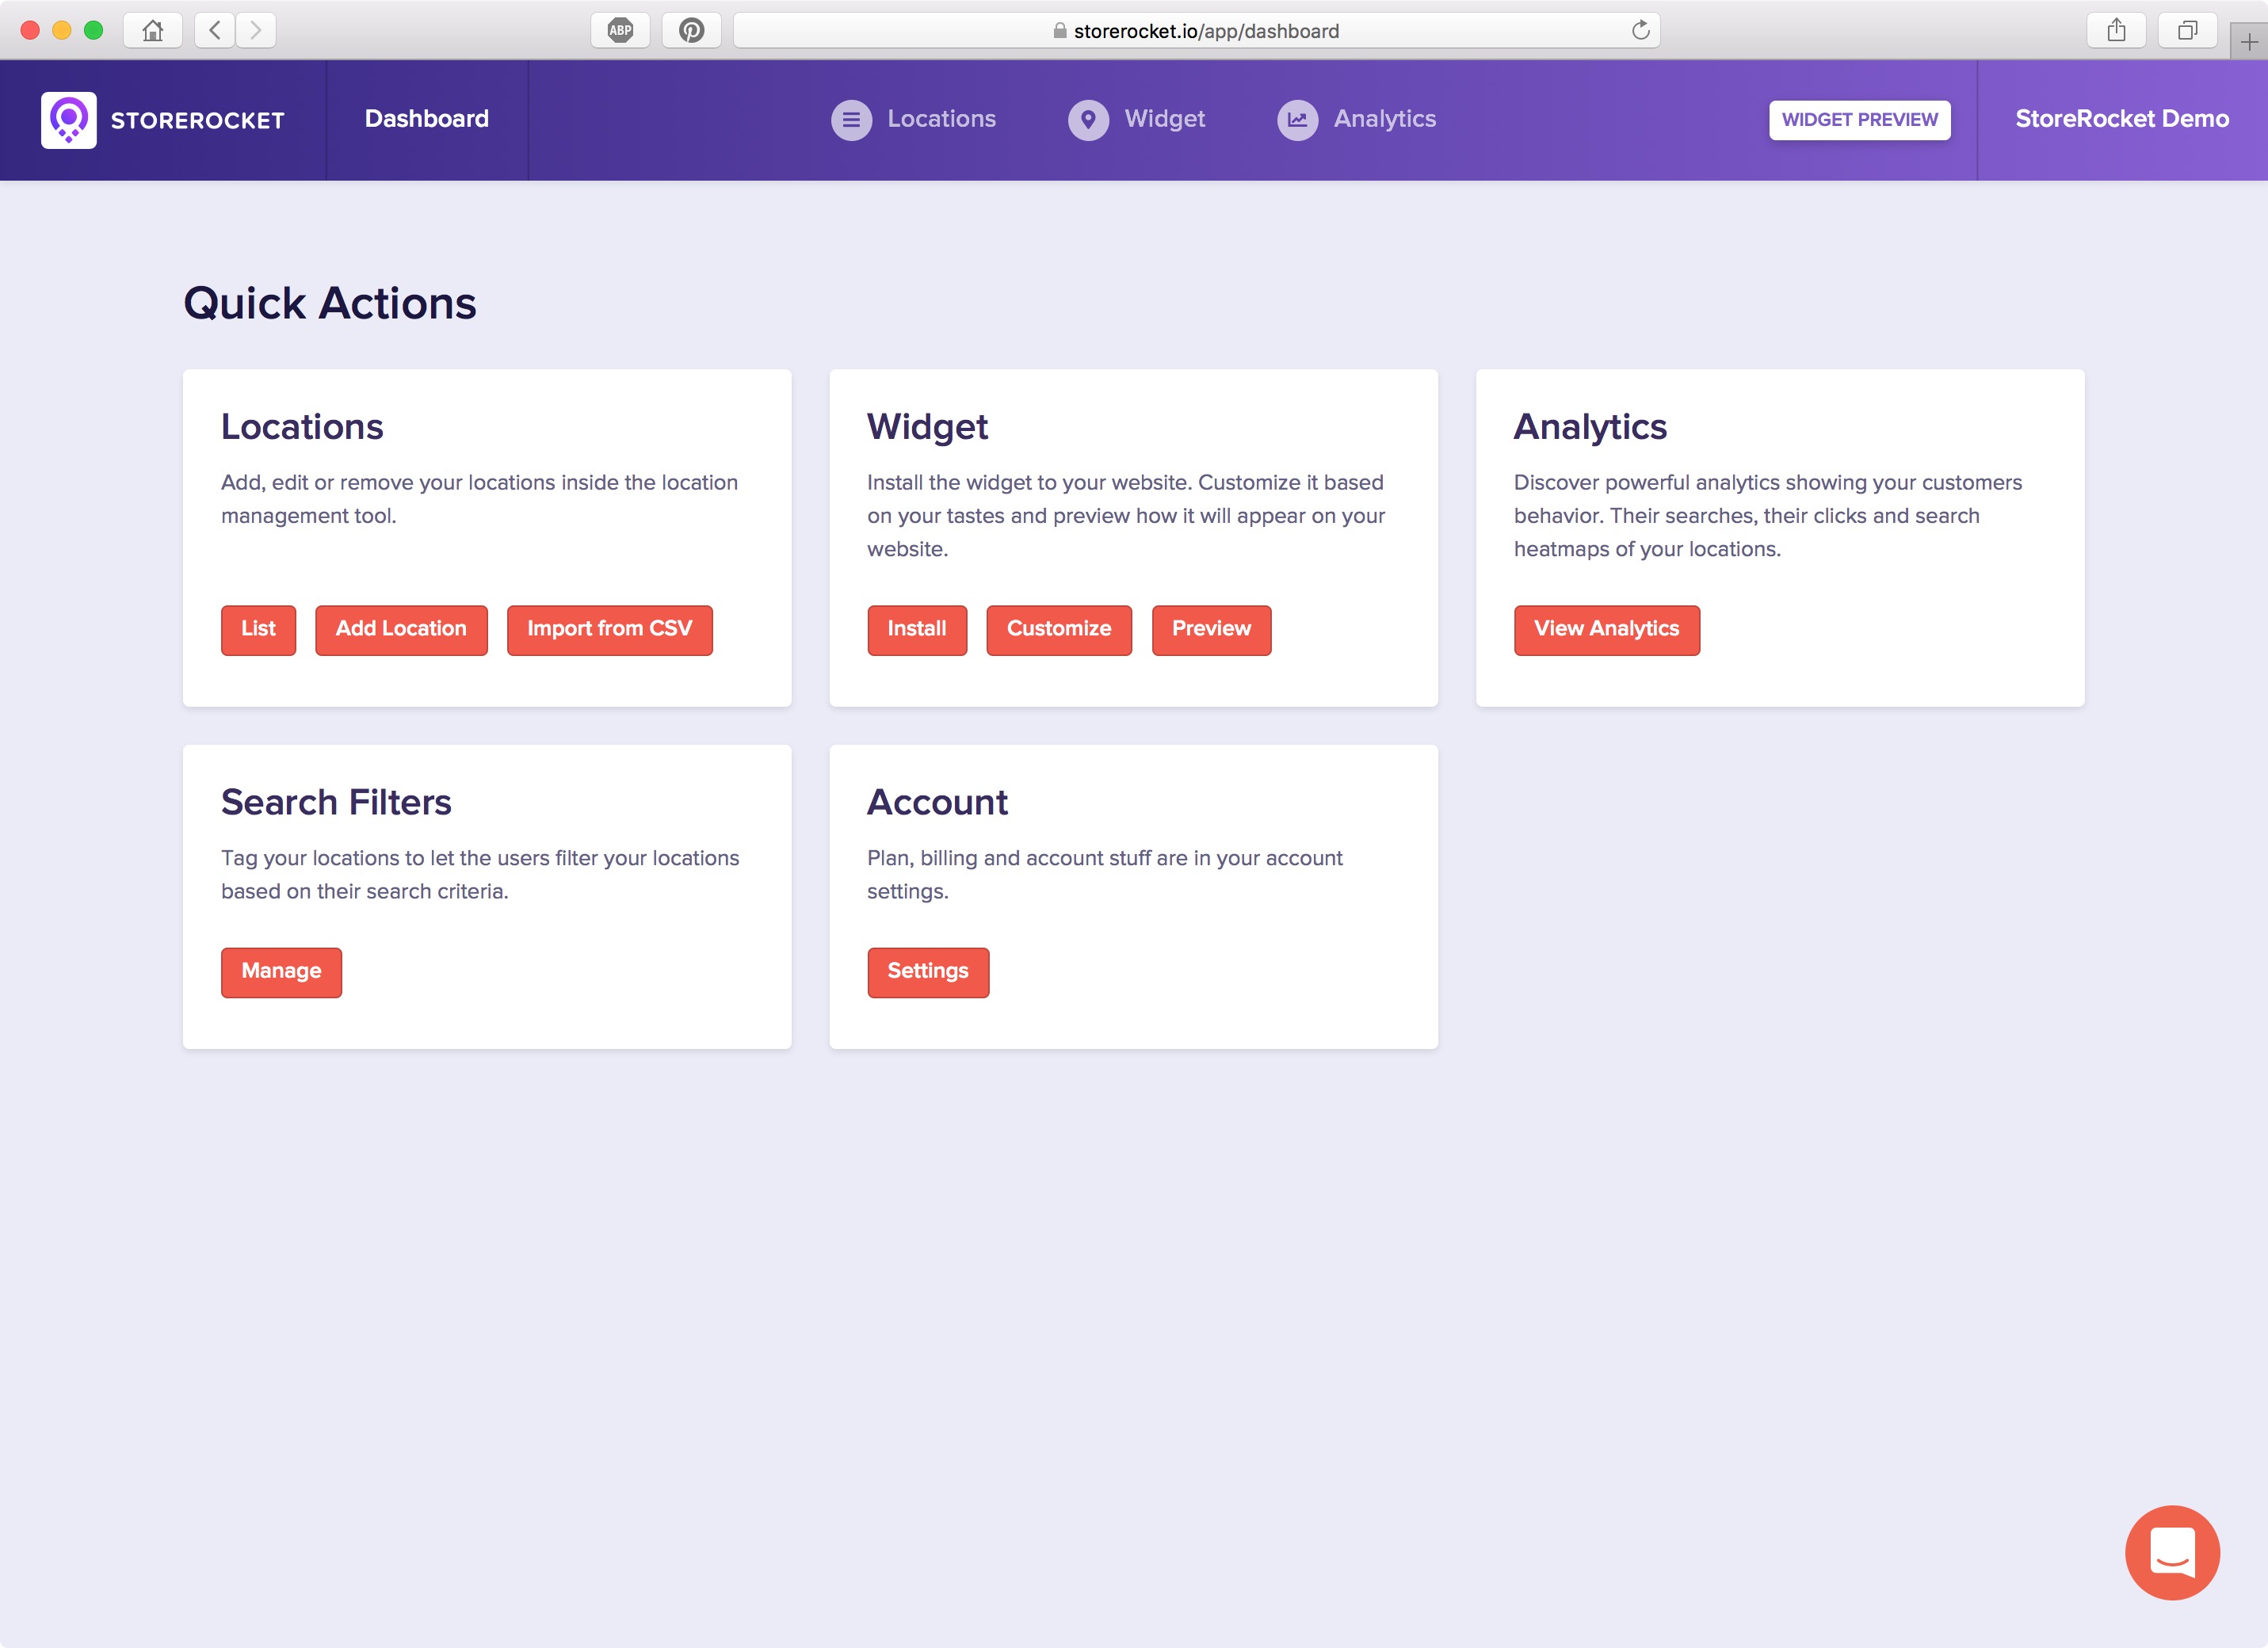
Get Started with StoreRocket and enter few details about you.
Right after signing up, you'll have in front your dashboard.
2. Add your locations
It's now time to add your locations!
You have two options here:
- Add a location manually, one by one
- Bulk import all your locations, if you have an Excel/CSV file
First, let's see how you can add a location manually.
Go to the Add Location page and you'll see the form to add your first location.
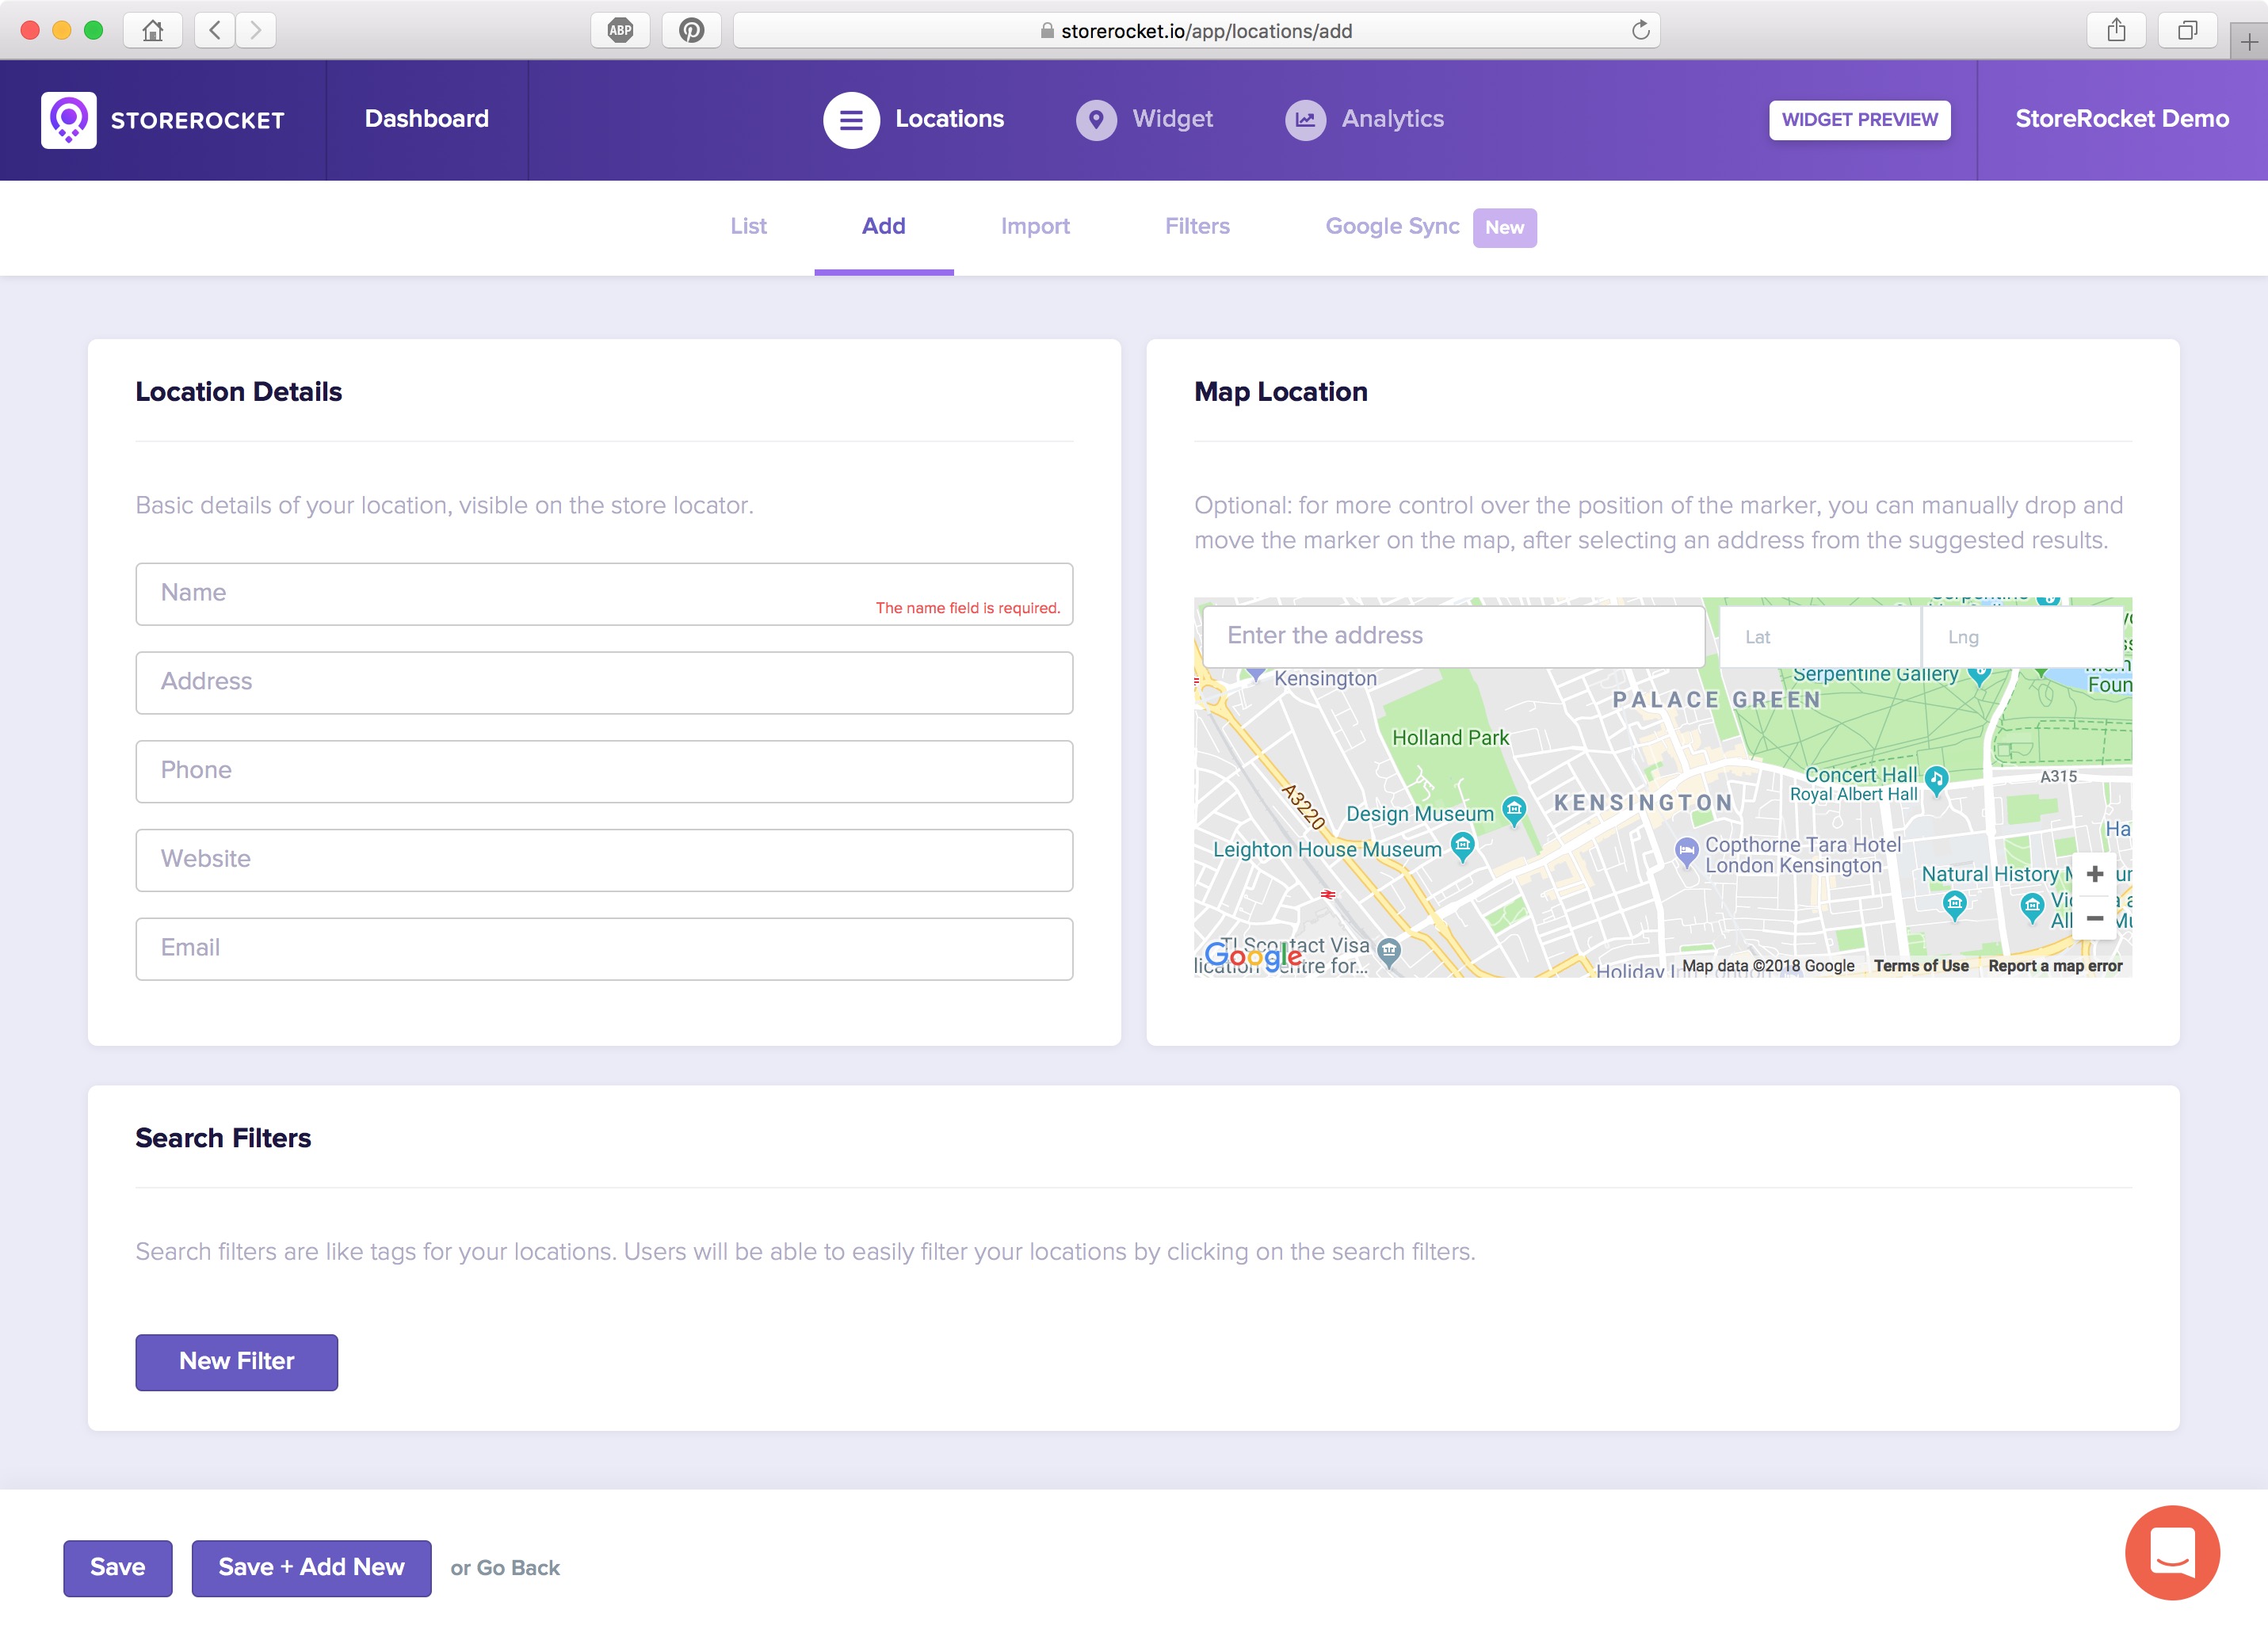
The only required fields are the location name and the location address.
PRO TIP: For the address, you can use the auto suggestion address field shown in the map at the right, this will automatically populate the address field at the left.
You may also enter extra information of your location such as the email, the phone number and the website. Based on our experience, more information you insert for your locations, more satisfied will be your customer experience and you'll be able to drive more foot traffic to your retailers.
Next, we have the search filters. These are like tags or categories for your locations. You can assign one or more to your locations and the visitor of your website will be able to filter through your locations based on the search criteria by easily switching them on and off.
Examples of search filters for a coffee shop company:
- Mobile Payment
- 24 Hours Open
- Free Wi-Fi
- Exclusive Rewards
- etc.
We strongly recommend you to think about some filters you can use for your locations. Statistics have shown that users are more likely to convert into customers when they have a pleasurable experience finding the closest store to them.
When you are happy with your location details, click Save and you'll have your first location, congratulations! 🎉
Add as many location as you like or proceed to install the store locator to your Shopify website.
3. Add the store locator to Shopify
I assume you want the store locator in a new page separate page on your Shopify website, but this method is the same for existing pages as well.
On your Shopify Admin, go to Online Store > Pages > Add page.
Name the new page as you prefer (e.g. Our Locations, Find Us, Store Locator).
Click on the Show HTML icon at the top right of the page editor and paste the code snippet that you find inside your Install Widget[] page of your StoreRocket dashboard.
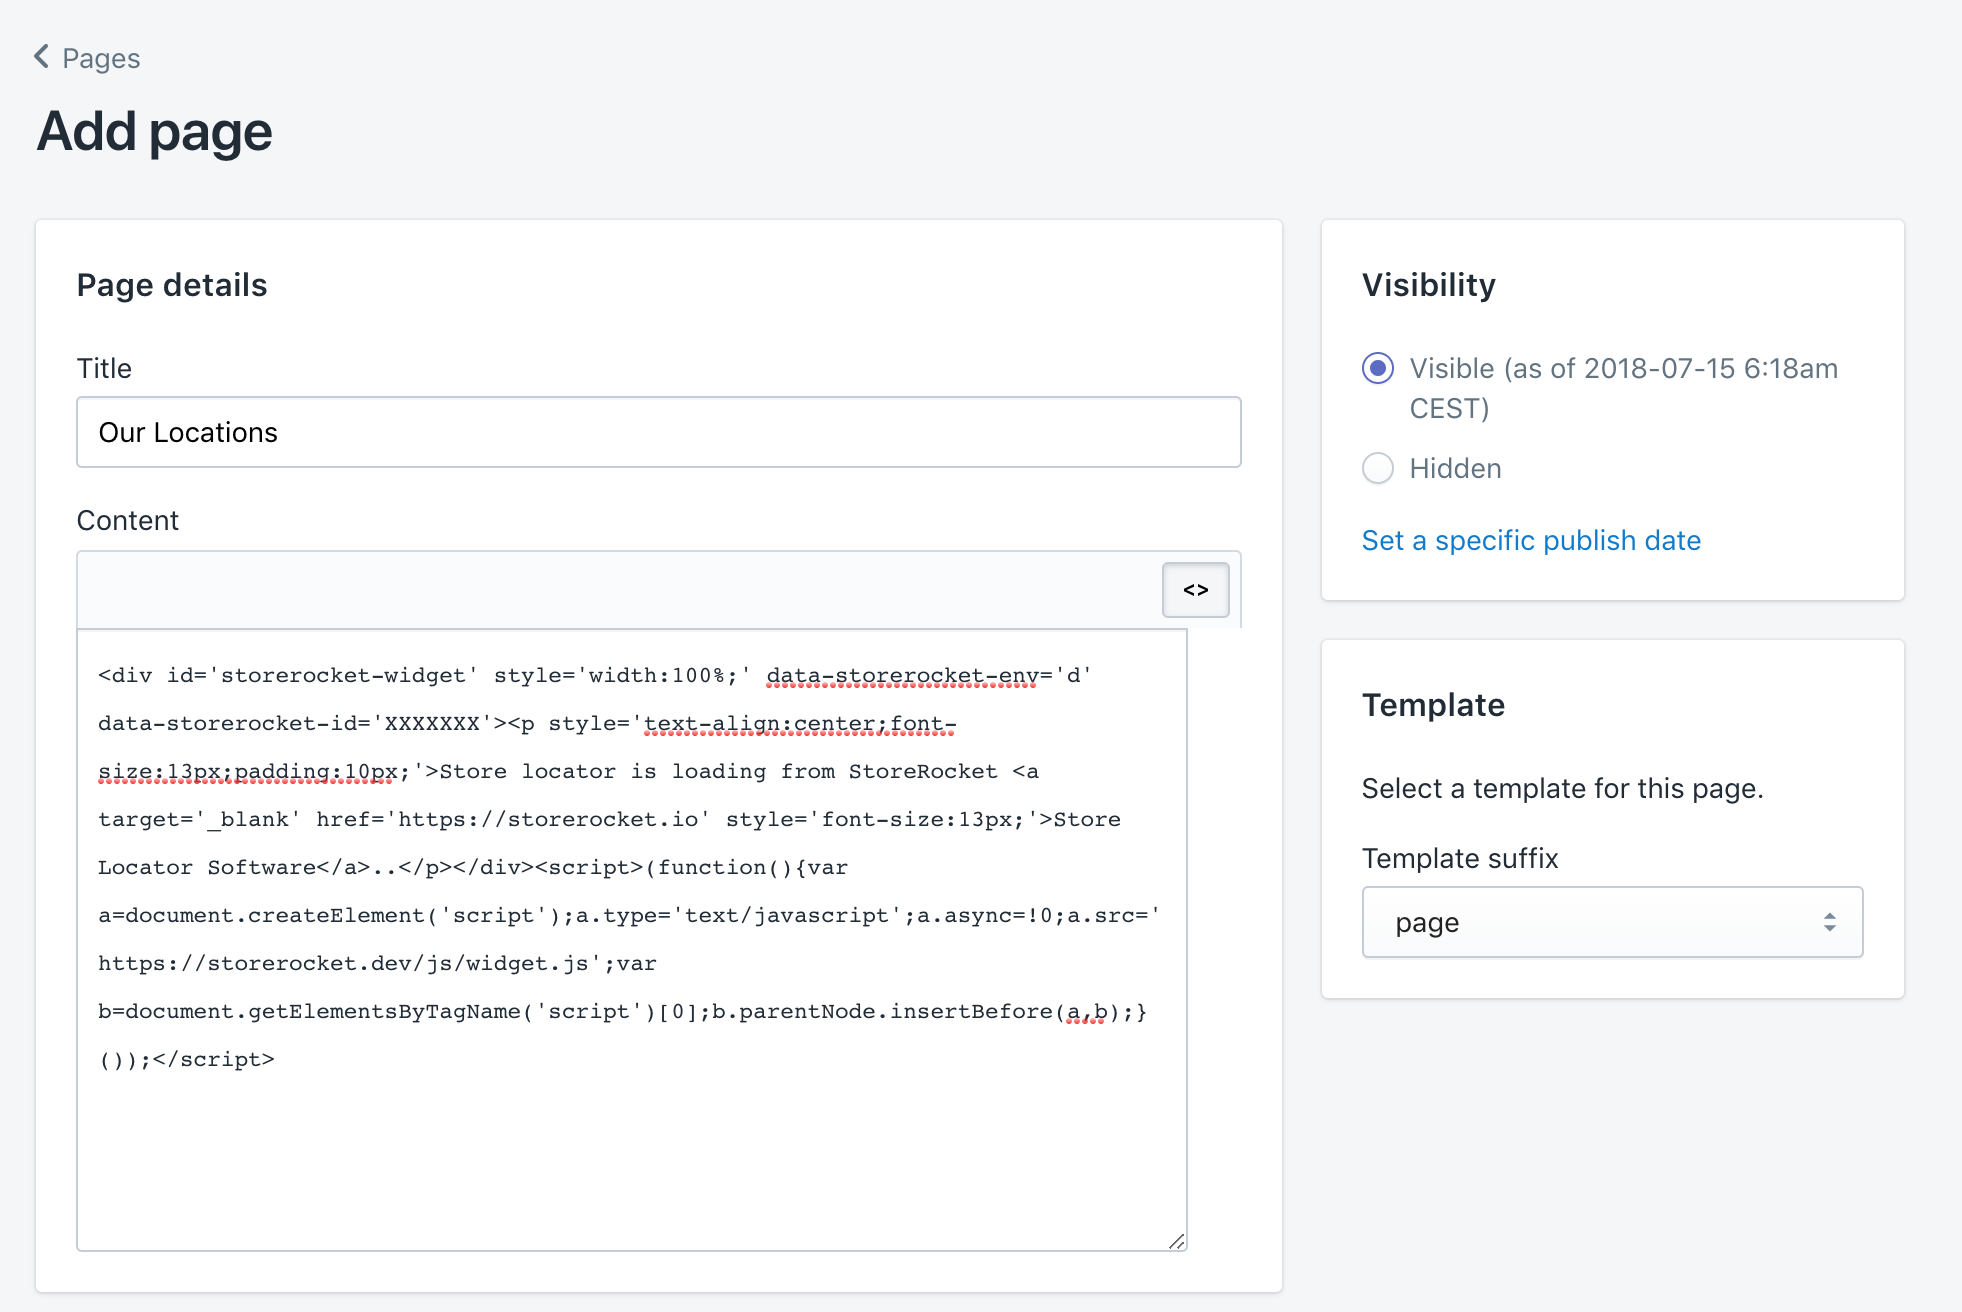
Click Save.
4. Done! 🙌🏻
Preview your page and you'll see your brand new store locator.
Now you can have some fun customizing your store locator widget in the Customize Widget of your StoreRocket dashboard. Choose your widget theme, your map styles, the default radius, if the widget should load all your locations or only the ones nearby the user and much more.
That was easy, wasn't it? 😀
Get started with StoreRocket for free today and add a powerful store locator to your Shopify website.