Adding a store locator to your website is a must nowadays, whether you have an e-commerce or you want to show your retail locations of your brand. Every day, hundreds of thousand people visit store locators to find products they want to purchase.
Creating a store locator from scratch requires time and money, whether you know how to build it by yourself or you ask your web developer. For this reason we created StoreRocket, which is a 'Store Locator As-a-Service' platform. Think of it like a plug and play store locator for your website that can be installed in few minutes and the best part is that it doesn't require you to write any code!
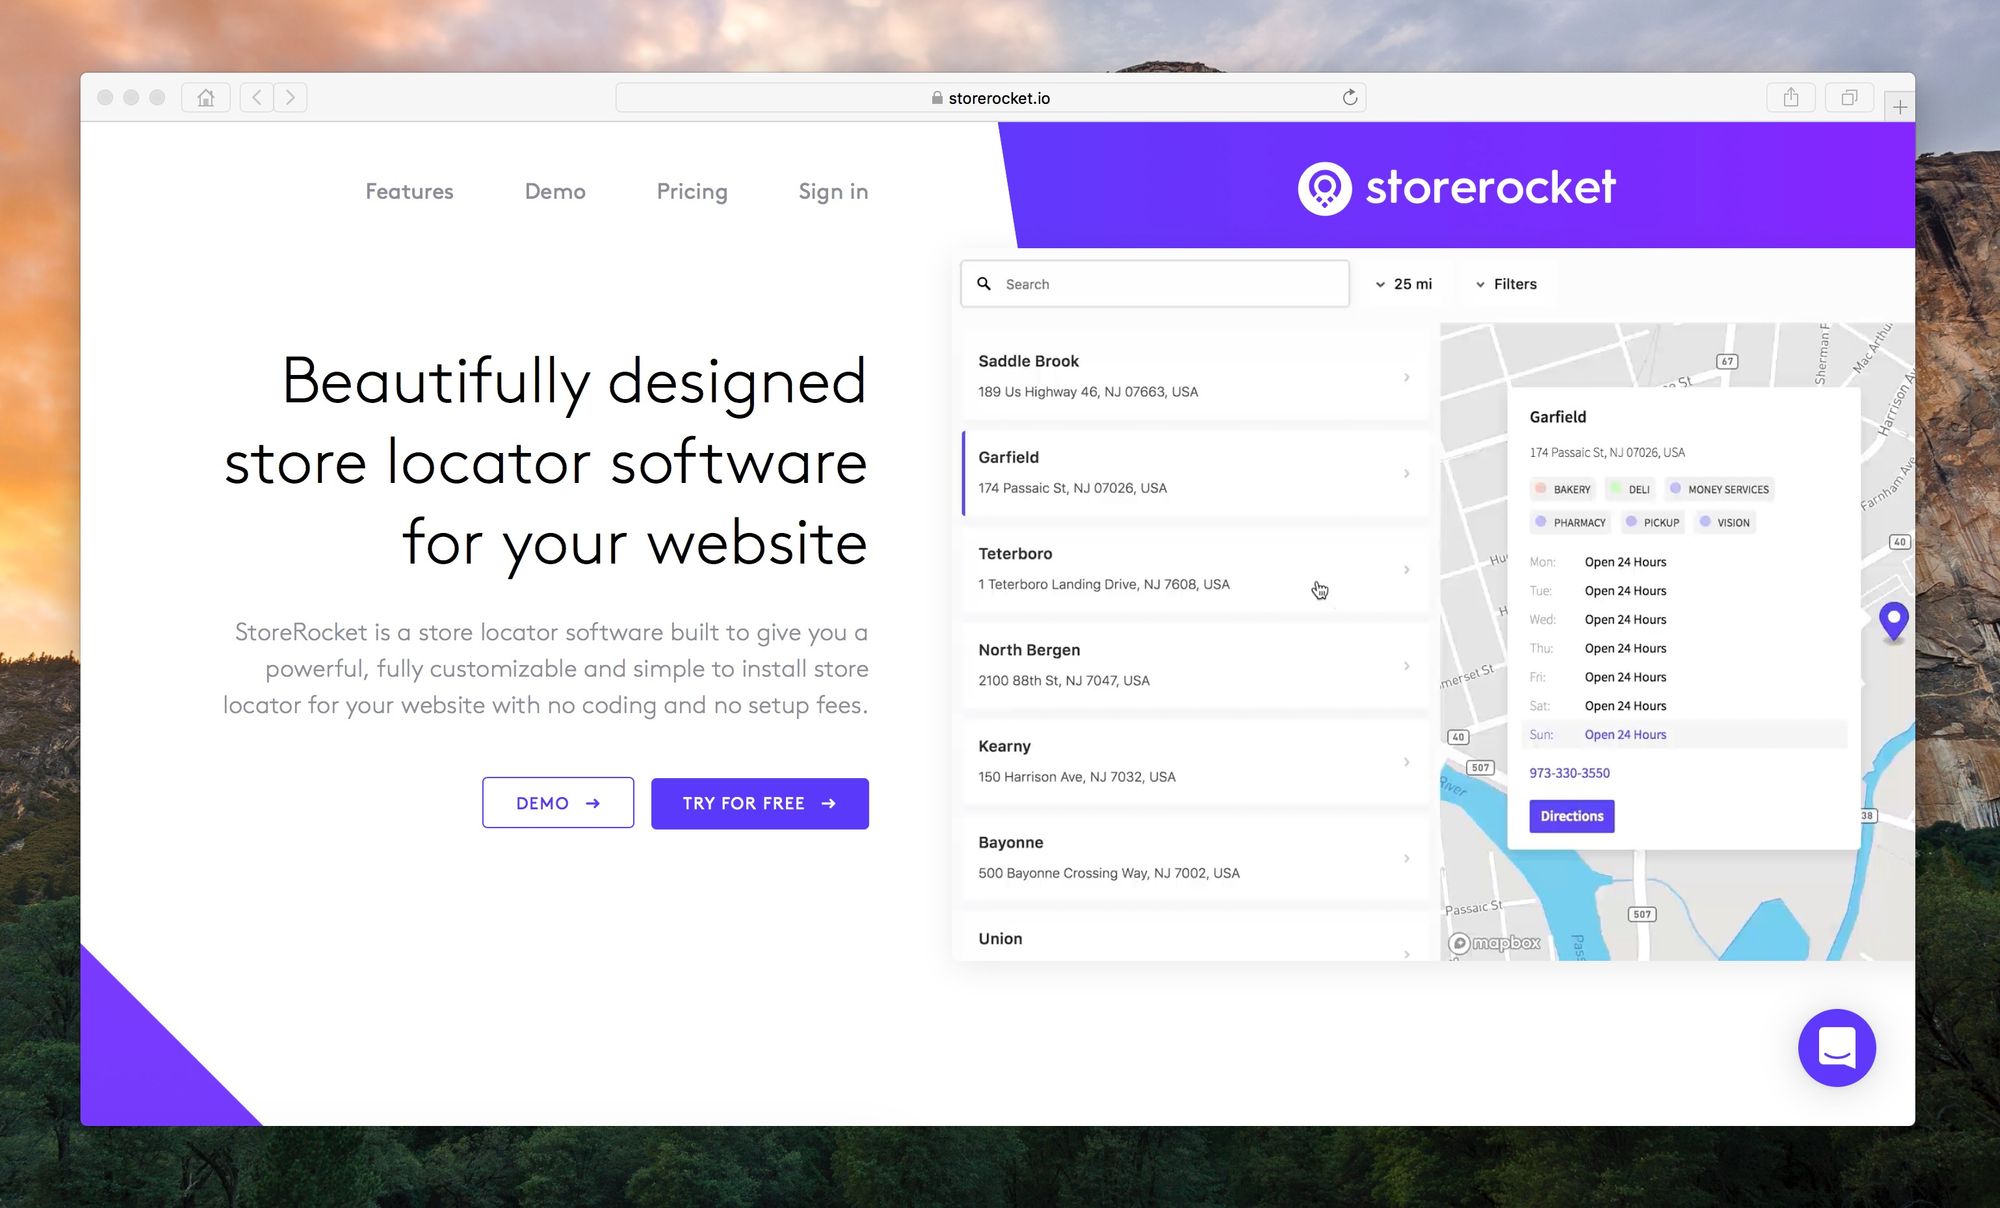
StoreRocket is a powerful store locator that will save you so much time and increase your sales by driving more foot traffic to your locations. You can choose between Google Maps and Mapbox as map providers. Today we will use Google Maps.
Let's see how we can use StoreRocket to add a beautifully designed and powerful Google Maps store locator to your website in less than 5 minutes.
Estimated Time: 5 minutes
Go to https://storerocket.io and create an account by clicking on the Try for free button. We are currently offering a no credit card 14 Days Free Trial. Feel free to try it with no strings attached.
Welcome to your StoreRocket dashboard where you can manage your locations, customize your store locator and much more.
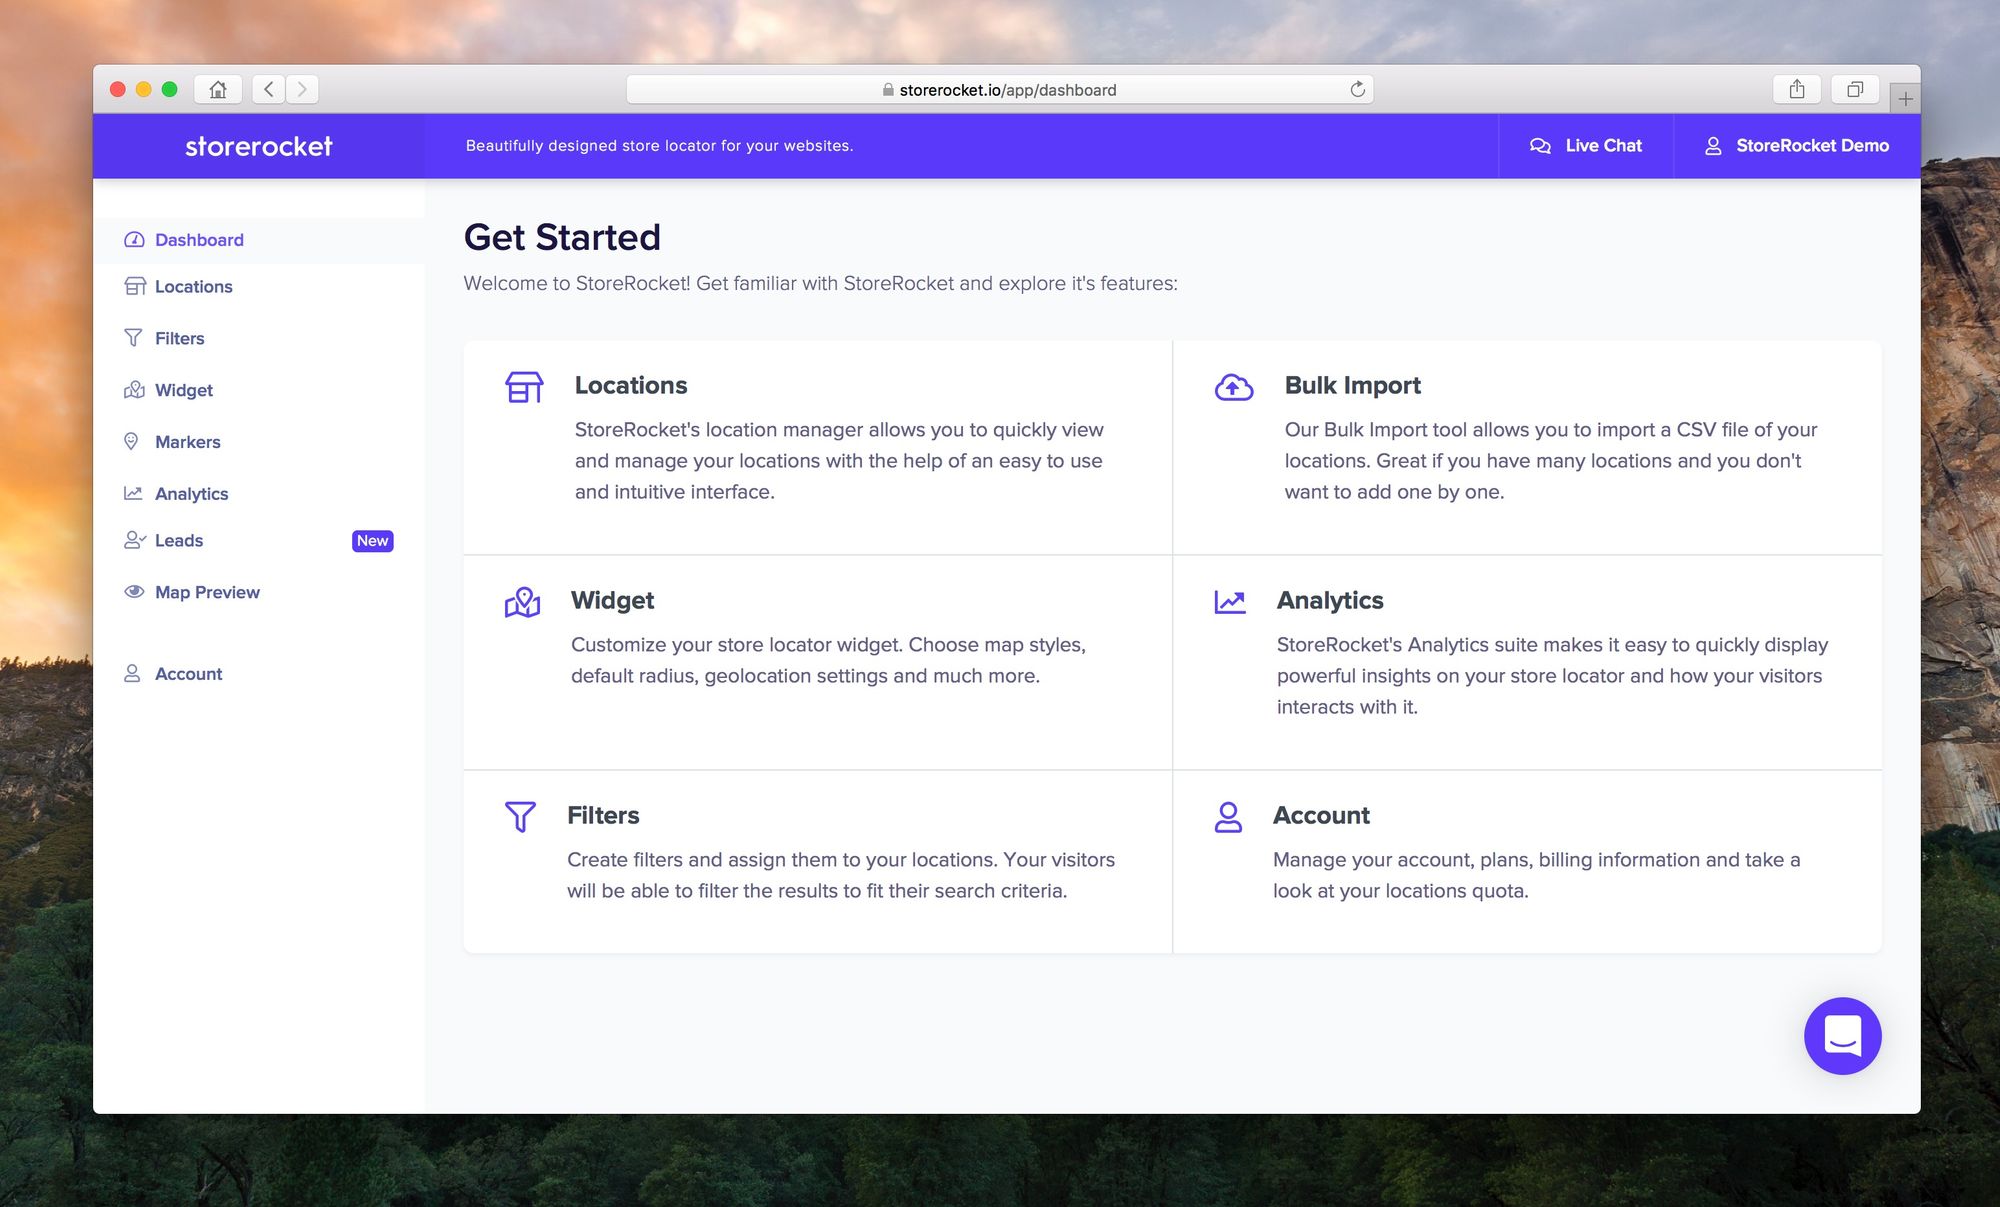
Let's create your first location by clicking on Locations from the menu at the side and then New location or by clicking here.
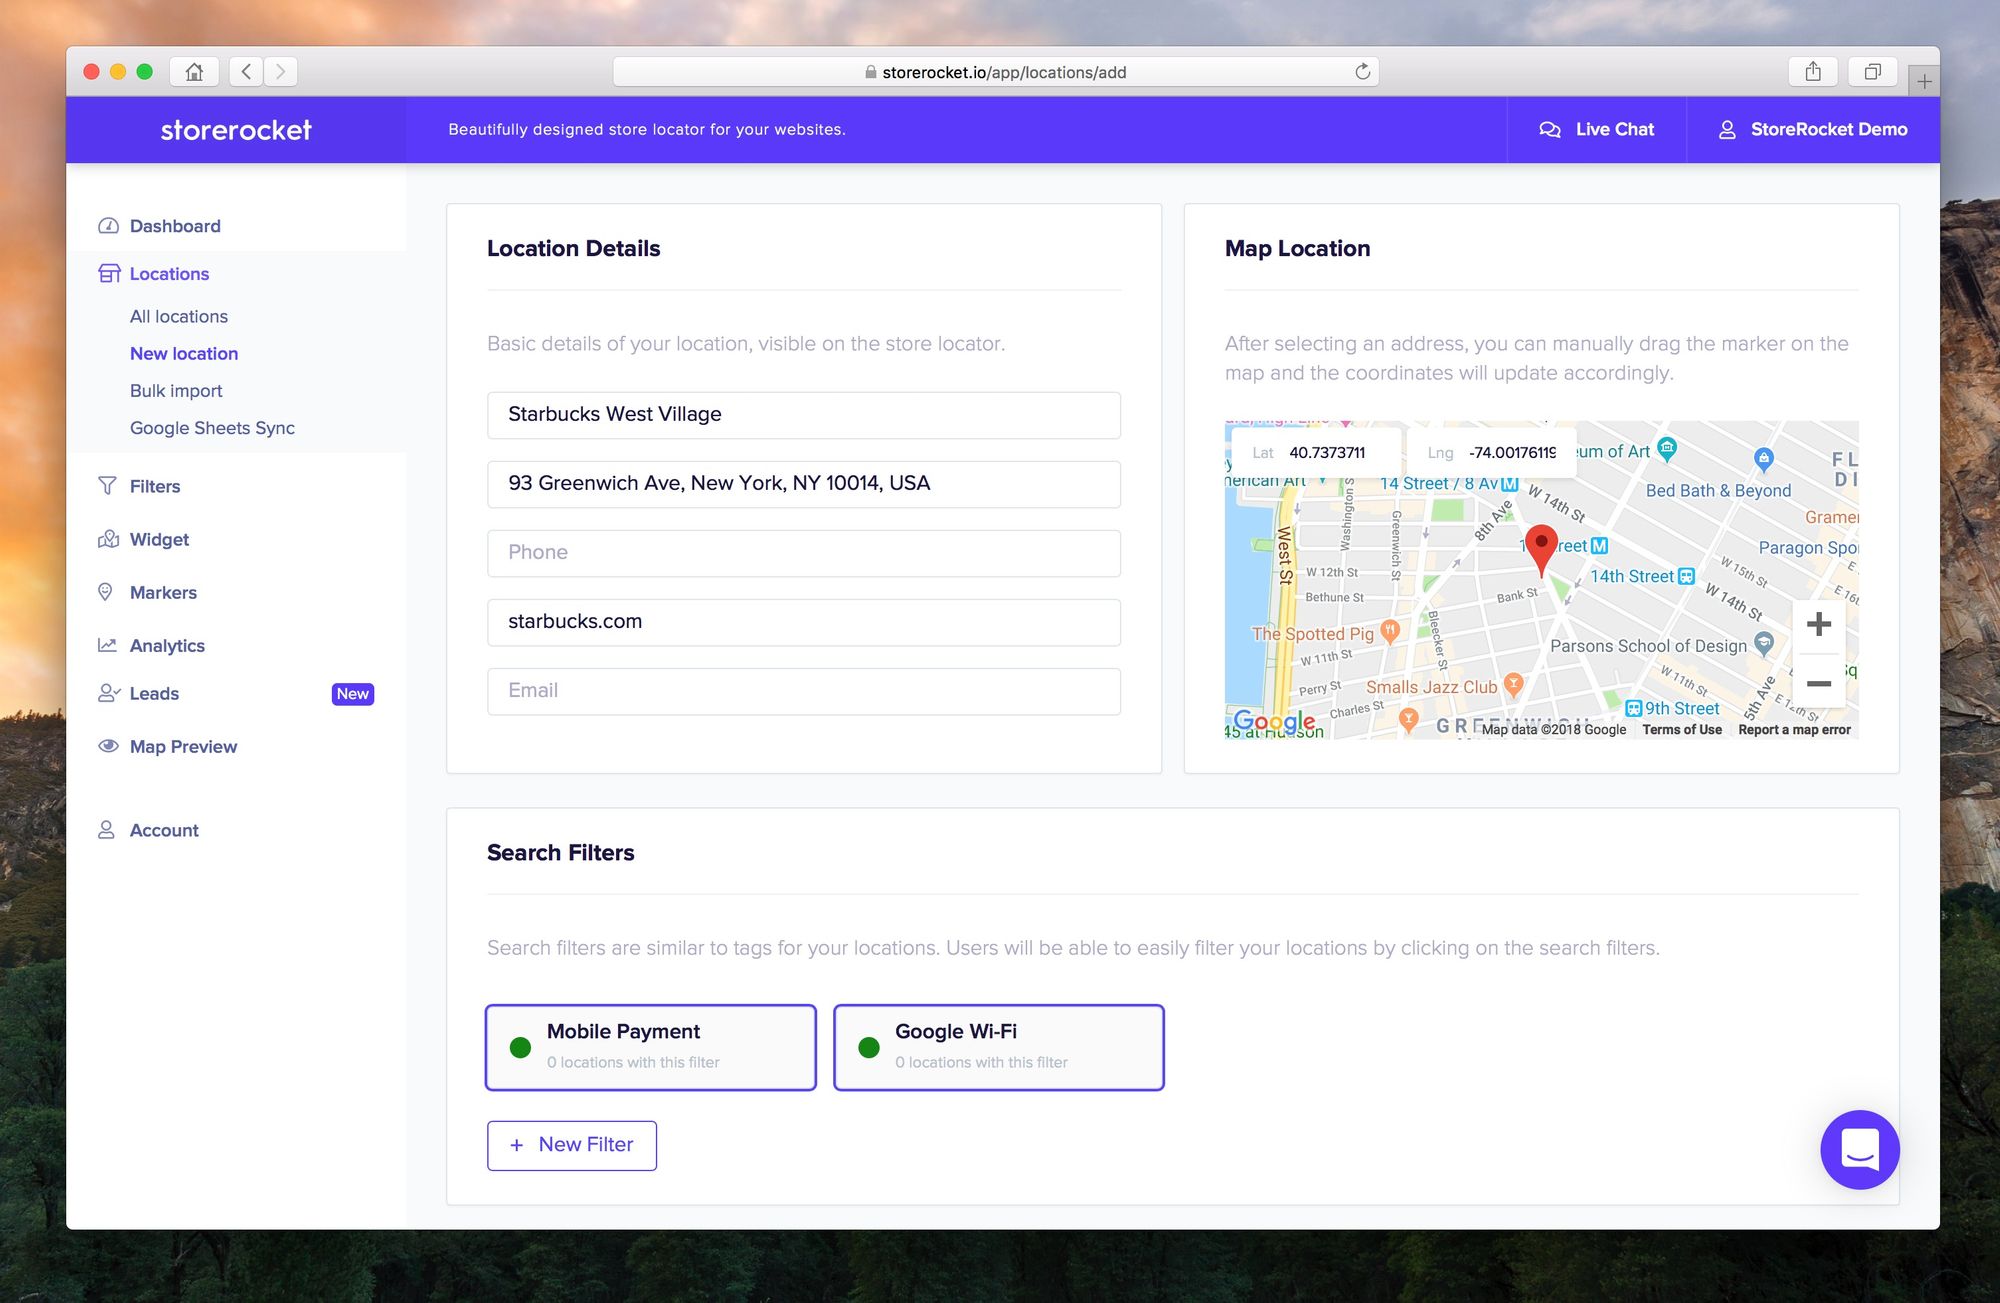
You can now enter the information of your first location in the form. The only required fields are the name of the location and the address.
If you want, you can add additional information such as the website, the email and the opening hours of your location.
You'll also see a section dedicated to the Filters. Filters are like tags for your locations. You can categorize them and your visitors will be able to filter down your locations based by clicking on the filters.
Examples of filters are:
- Open 24 Hours
- Accepts Mobile Payment
- Premium Supplier
- Offers Truck Rental
You can categorize your locations with filters based on your business. To see some live examples, check out our demos (Shake Shack demo, Home Depot demo, Starbucks demo, IKEA demo).
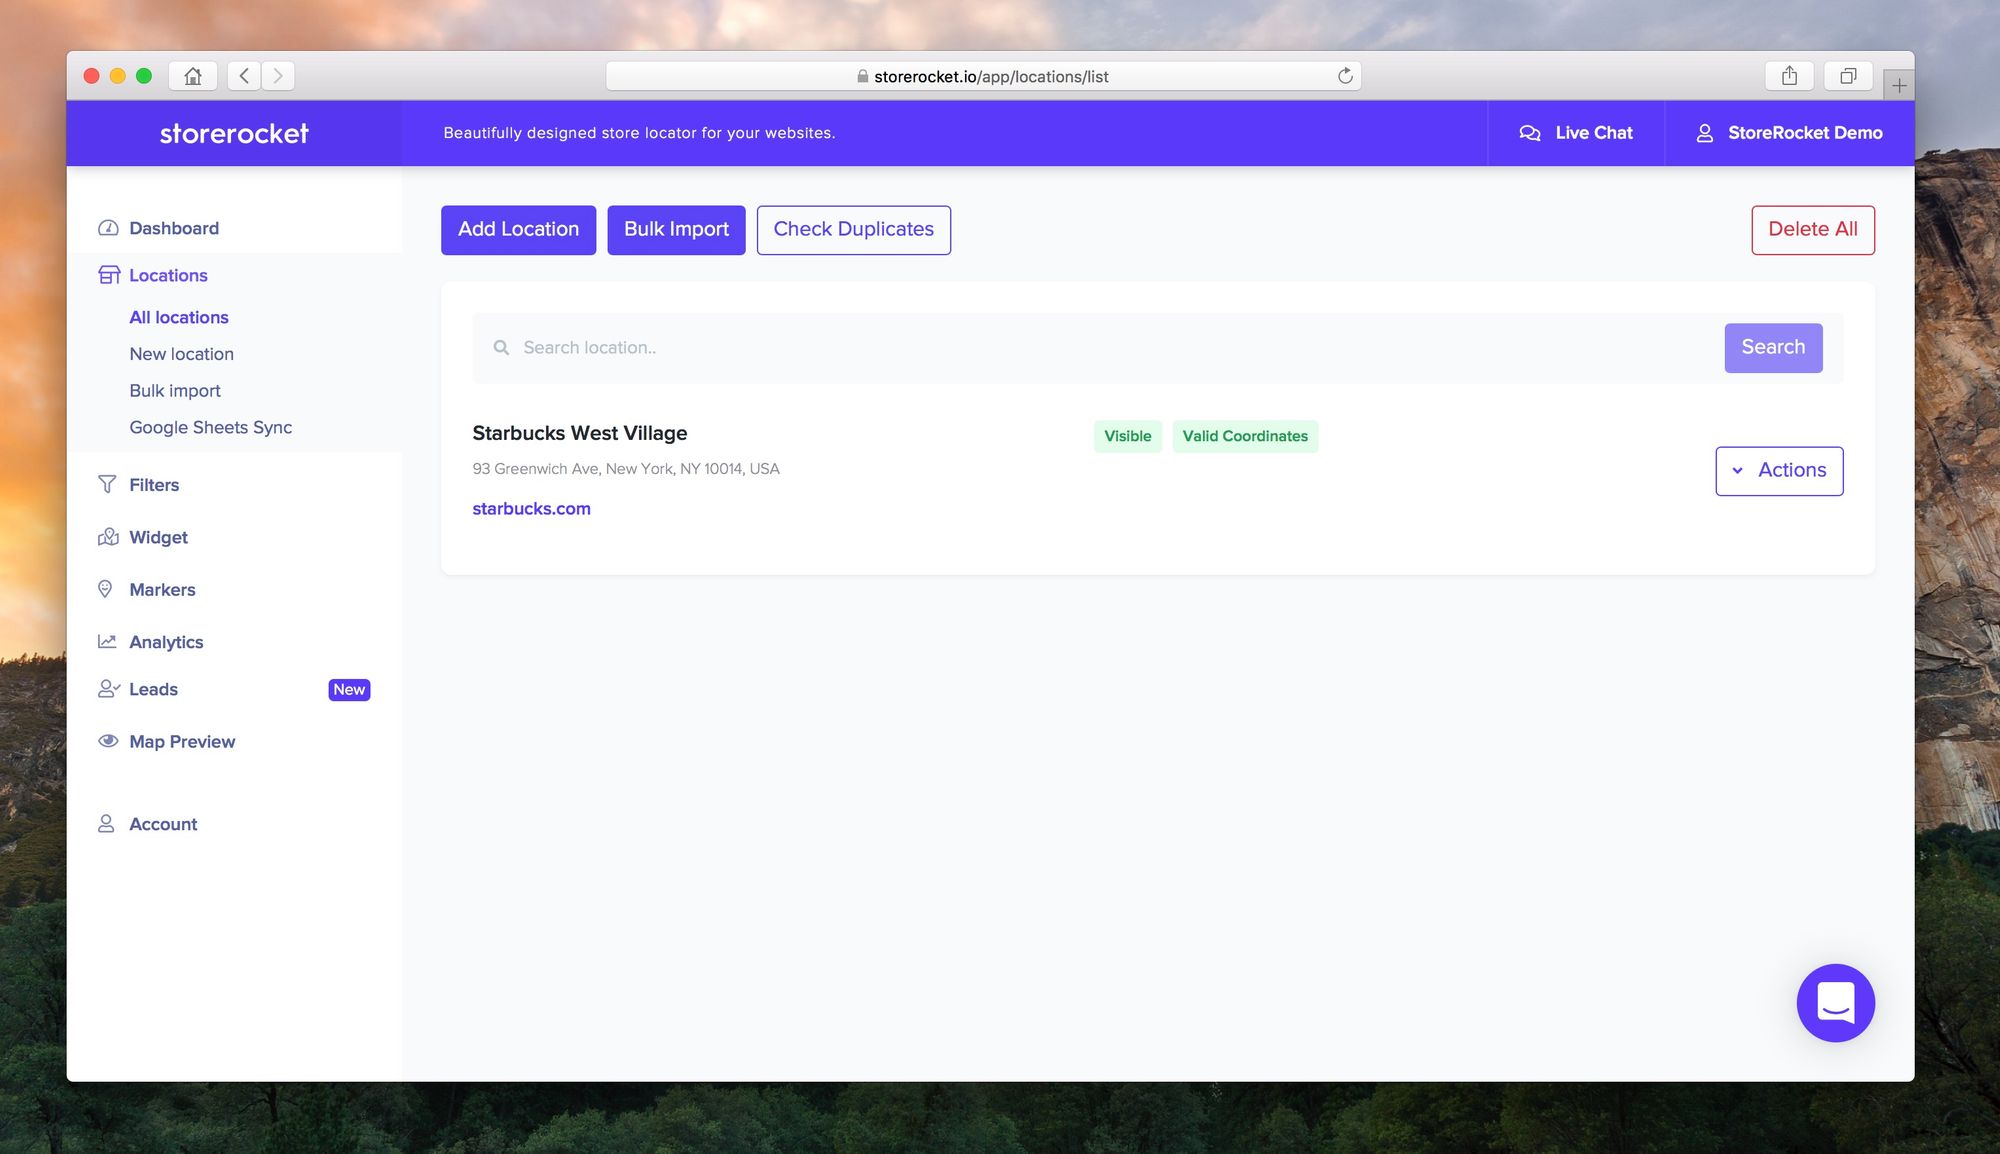
When you are done, click Save and you should see your new location in the list!
Let's install the store locator widget on your website. From the menu, go to Widget and then Install or click here.
You'll see a code snippet at the top (Option 1) to copy to the clipboard.
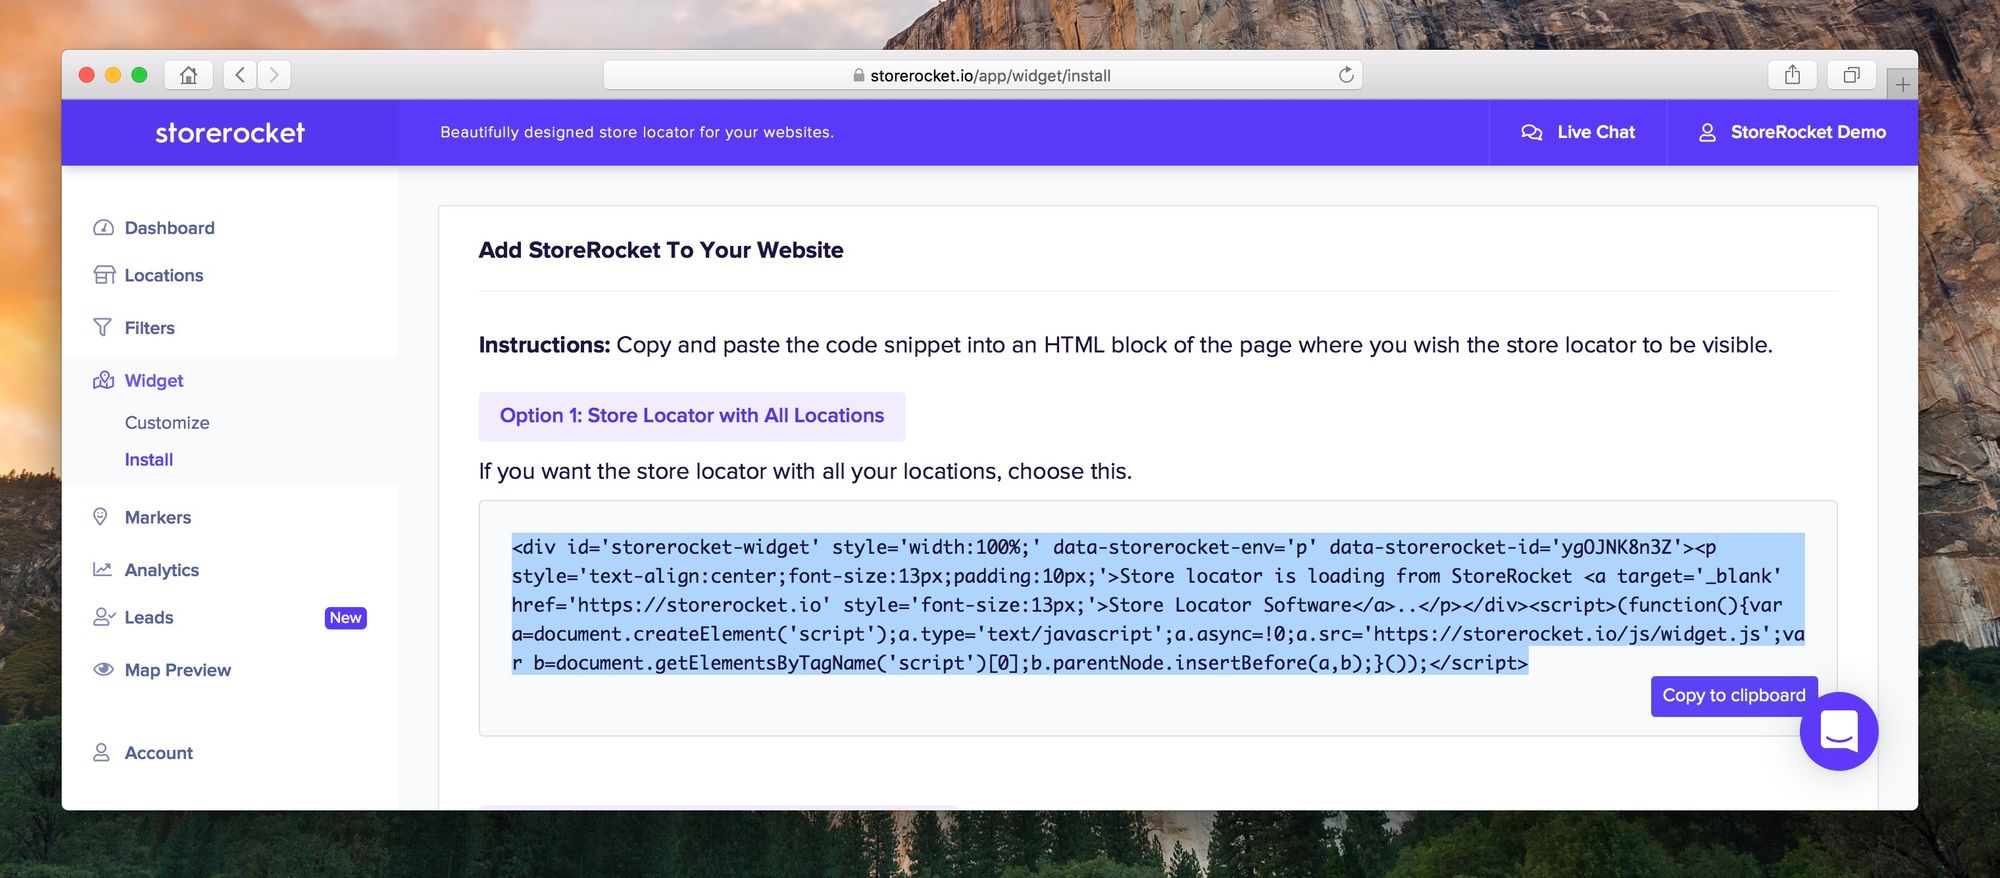
Copy the code snippet to the clipboard and paste that code in the page of your website of your choice. As long as you can paste the code into the page, you can install the widget in any website, no matter what platform you are using (WordPress, Shopify, Squarespace, Webflow, etc.).
Paste the code into an HTML block on the page of your website then save.
Visit that page and you should be able to see your store locator with the location that you added a few minutes ago. I promised you it was going to be fast!
You can now proceed to add more locations directly from the StoreRocket Dashboard or customize your store locator widget. You can choose the map colors, the map theme, default radius, and much more. All your settings can be found inside the Widget > Settings page.
Do you have many locations and you don't want to add them manually?
We have a powerful Bulk Import tool that can import thousands of locations in few minutes by upload a CSV file. Go to the Locations > Bulk Import page, download the CSV template (it's an Excel file), and follow the instructions.
If you need help, we can help you upload your locations, customize the design of your store locator and everything else. Drop us a message by clicking on the bottom right customer support icon and we'll help you!
Have an amazing day from StoreRocket!